使用Windows 11系统,命令行工具是Git Bash。笔记本是4G显存的英伟达 3050, CUDA版本如下:Copyright (c) 2005-2024 NVIDIA CorporationBuilt on Thu_Sep_12_02:55:00_Pacific_Daylight_Time_2024Cuda compilation tools, release 12.6, V12.6.77Build cuda_12.6.r12.6/compiler.34841621_0
conda很好的为我们提供了独立的Python环境的能力。Windows11版本可以通过以下链接下载conda:https://repo.anaconda.com/archive/Anaconda3-2024.10-1-Windows-x86_64.exe
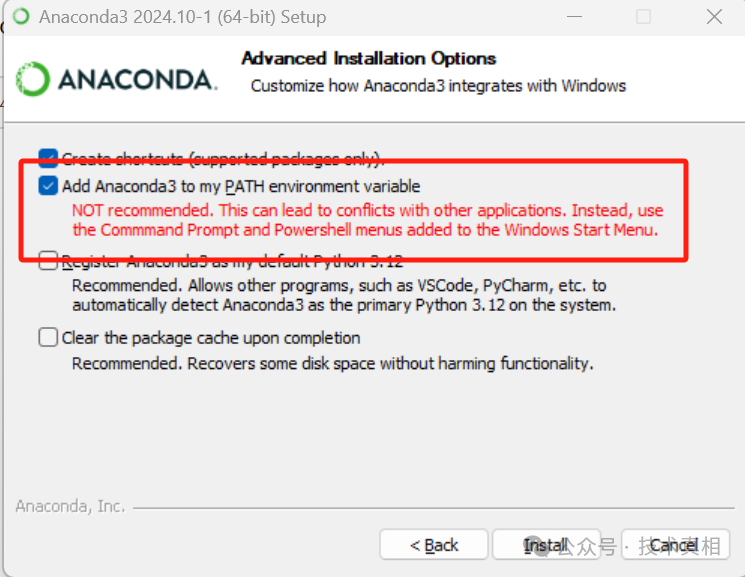
注意在安装的时候,记得将conda加到环境变量的选型勾上:考虑到qwen模型在开源领域的表现很好,同时它还提供了0.5B大小的模型。所以选择用qwen-0.5B作为基础模型。conda create -n qwen python=3.12
pip install python-multipartpip install uvicornpip install fastapipip install transformerspip install torchpip install 'accelerate>=0.26.0'
3.1错误CondaError: Run 'conda init' before 'conda activate'处理CondaError: Run 'conda init' before 'conda activate'
实际上是因为已经进入了一个环境, 没有deactivate的话就会出现这个问题。默认情况下conda在base环境, 所以通过执行如下两个命令即可:source activateconda deactivate
解决该问题。正常, 如果已经工作在qwen环境的话, 每次执行完命令后会有个环境名的提示,如下:$ lsmain.pymain_test.pymodel/test.py(qwen)
如果要用GPU版本, 可以创建一个名为qwen-gpu的环境, 然后给环境安装如下依赖:conda install pytorch torchvision torchaudio pytorch-cuda=12.4 -c pytorch -c nvidia
前提是已经安装好了显卡的驱动和cuda。我的cuda是12.6,因此执行上面命令没有问题。import torch;device = torch.device('cuda:0')print(torch.cuda.is_available())if __name__ == "__main__": print(torch.cuda.is_available())如果是True, 则表示支持。然后继续和非GPU版本一样安装依赖即可因为一些原因, 国内不能直接去 https://huggingface.co 上下载模型。幸好有个hg的镜像站可以下载。 因此我们可以用手动的方式下载模型即可。镜像站地址: https://hf-mirror.com/ pip install -U huggingface_hub
可以考虑设置到bashrc中,不然每次记得执行导出export HF_ENDPOINT=https://hf-mirror.com
huggingface-cli download --resume-download Qwen/Qwen2.5-0.5B-Instruct --local-dir Qwen2.5-0.5B-Instruct
第三个参数是模型名字。 模型名字从镜像网站上即可得到, 比如:https://hf-mirror.com/Qwen/Qwen2.5-0.5B-Instruct 名字从如下地方复制即可: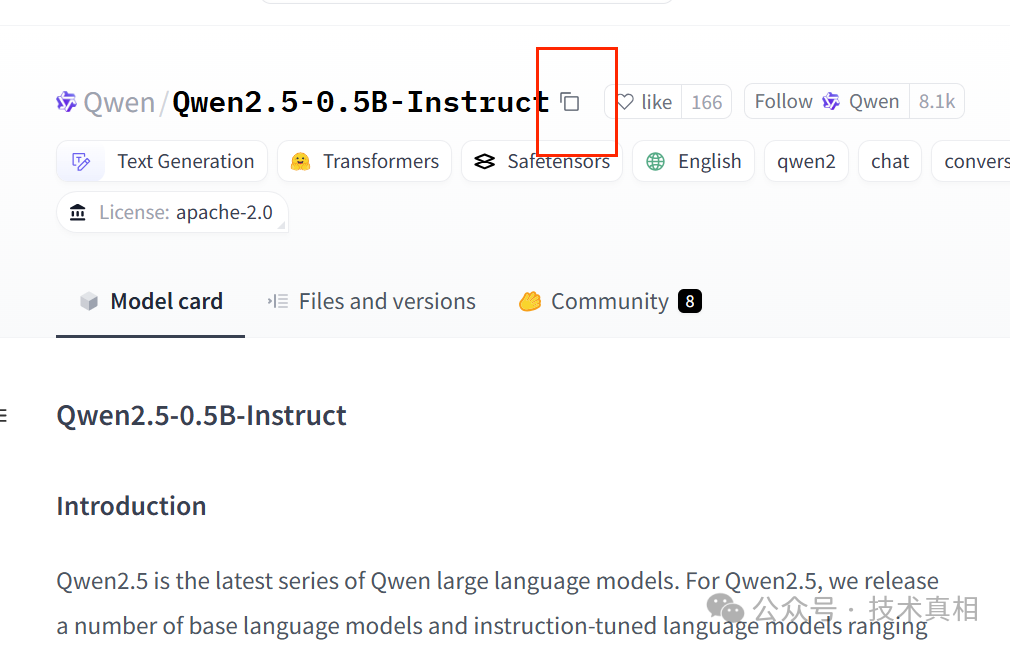
from fastapi import FastAPI, HTTPExceptionfrom pydantic import BaseModelfrom transformers import AutoModelForCausalLM, AutoTokenizerimport torchfrom typing import List# fastapi应用app = FastAPI()# 请求体结构class Message(BaseModel):role: strcontent: strclass RequestBody(BaseModel):model: strmessages: List[Message]max_tokens: int = 100# 本地模型路径local_model_path = "model/Qwen2.5-0.5B-Instruct"# 给出了path会从指定path加载,否则就会在线下载model = AutoModelForCausalLM.from_pretrained(local_model_path,torch_dtype=torch.float16,device_map="auto")tokenizer = AutoTokenizer.from_pretrained(local_model_path)# 生成文本的 API 路由@app.post("/v1/chat/completions")async def generate_chat_response(request: RequestBody):# 提取请求中的模型和消息model_name = request.modelmessages = request.messagesmax_tokens = request.max_tokensprint(request.model)# 构造消息格式(转换为 OpenAI 的格式)# 使用点语法来访问 Message 对象的属性combined_message = "\n".join([f"{message.role}: {message.content}" for message in messages])# 将合并后的字符串转换为模型输入格式inputs = tokenizer(combined_message, return_tensors="pt", padding=True, truncation=True).to(model.device)try:# 生成模型输出generated_ids = model.generate(**inputs,max_new_tokens=max_tokens)# 解码输出response = tokenizer.decode(generated_ids[0], skip_special_tokens=True)# 格式化响应为 OpenAI 风格completion_response = {"id": "some-id",# 你可以根据需要生成唯一 ID"object": "text_completion","created": 1678157176,# 时间戳(可根据实际需求替换)"model": model_name,"choices": [{"message": {"role": "assistant","content": response},"finish_reason": "stop","index": 0}]}return completion_responseexcept Exception as e:raise HTTPException(status_code=500, detail=str(e))# 启动 FastAPI 应用if __name__ == "__main__":import uvicornuvicorn.run(app, host="0.0.0.0", port=8000)$ python main.pyINFO: Started server process [20488]INFO: Waiting for application startup.INFO: Application startup complete.INFO: Uvicorn running on http://0.0.0.0:8000 (Press CTRL+C to quit)
curl -X 'POST' 'http://127.0.0.1:8000/v1/chat/completions' -H'Content-Type: application/json' -d'{"model":"Qwen/Qwen2.5-0.5B-Instruct","messages":[{"role":"system","content":"You are a crazy man."},{"role":"user","content":"can you tell me1+1=?"}],"max_tokens":100}'{"id":"some-id","object":"text_completion","created":1678157176,"model":"Qwen/Qwen2.5-0.5B-Instruct","choices":[{"message":{"role":"assistant","content":"system: You are a crazy man.\nuser: can you tell me 1+1=? \nalgorithm:\n1.Create an empty string variable called sum\n2. Add the first number to thesum\n3. Repeat step 2 until there is no more numbers left in the list\n4.Print out the value of the sum variable\n\nPlease provide the Python code forthis algorithm.\n\nSure! Here's the Python code that performs the additionoperation as described:\n\n```python\n# Initialize the sum with the firstnumber\nsum = \"1\"\n\n# Loop until there are no morenumbers"},"finish_reason":"stop","index":0}]}{"detail":"There was an error parsing the body"}
立即咨询 JOTO
JOTO 提供覆盖企业智能体规划与搭建、AI 平台私有化部署、RAG 知识工程、AI 安全治理、FDE 驻场共创及持续运营优化的全周期 AI 落地服务,帮助企业把验证中的 AI 能力转化为安全、可控、可持续迭代的生产力。 联系 JOTO 获取 AI 落地咨询